


Today we announce branches in public beta. With branches, you can develop and test new features in isolated Tinybird environments using real, production data.
Here's what's new:
- Create a branch from the UI or CLI—You can branch your Tinybird environment with
tb branch createor directly from the Tinybird UI. - Test against production data—When you create a branch, you can optionally bring over the last modified partition for each data source, allowing you to test new work against production data.
- Develop a branch locally—You can run
tb --branch=branch_name devin the Tinybird CLI to sync your local filesystem with the branch's cloud environment project.
Why branches?
Back in April, we announced Tinybird Forward, a new evolution of the Tinybird user-experience designed. Forward made the Tinybird developer experience local-first, eliminating cloud dependencies in dev and CI, simplifying schema iterations and deployments, and signficantly speeding up development cycles.
However, you've also given us some great feedback about Forward:
- You don't always want to run Docker to work with Tinybird
- It needs to be easier to test against production data
Branches address that feedback, giving you more flexibility in how you both develop new features and iterate production.
How to use branches
Branches give you the ability to develop and test your work against production data. Unlike Tinybird Local, branches are deployed in ephemeral cloud environments.
You use branches when:
- You want to test your changes with real production data.
- You need to work with preview environments in your CI/CD pipeline before deploying to production.
- You don't want to use Docker and you want to test your changes without affecting production.
Create a branch
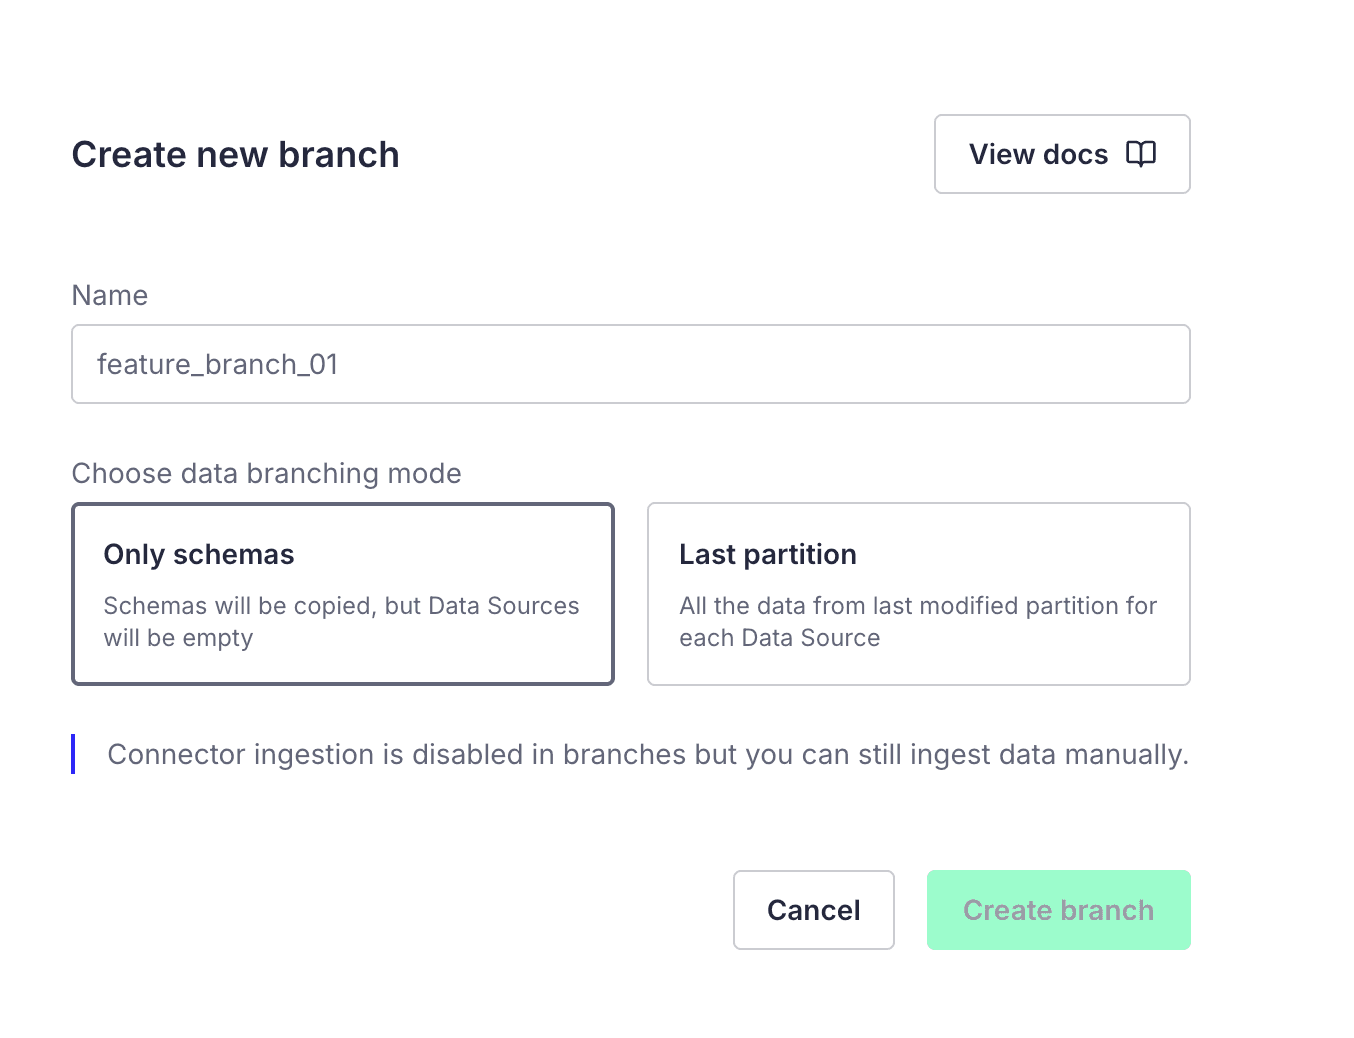
You can create a branch from the UI:
...or the Tinybird CLI:
# branch only schemas and SQL
tb branch create branch_name

# branch with latest modified partition for each prod data source
tb branch create branch_name --last-partition
If you intend to use a branch for long-running or distributed changes, we recommend also creating a git branch to track changes to your files.
Work within a branch
Once you've created a branch, you can edit the project as needed. Sync your local filesystem to the branch with:
tb --branch=branch_name dev
You can also open the branch in the Tinybird UI
tb --branch=branch_name open
Any edits you make in the local filesystem will automatically be deployed to the branch environment. It's very similar to how tb dev works with Tinybird Local, except changes are being deployed and synced with a cloud environment instead of your local Docker runtime.
When you close the terminal or stop the process with Ctrl+C, development against the branch will stop, but the filesystem will not automatically revert back to your previous local commit.
Test with a branch
You can run integration tests with your other application systems against Tinybird branches using tokens for that branch's environment. For example, to fetch an API endpoint from a branch:
# Start the branch and copy the token (or copy from the UI)
tb --branch=my_branch dev
tb token copy api_read && export TB_BRANCH_TOKEN=$(pbpaste)

# Fetch the endpoint with the branch env token
curl - X GET \
  - H "Authorization: Bearer $TB_BRANCH_TOKEN" \
  "https://api.tinybird.co/v0/pipes/endpoint.json"
Ingest data to a branch
If specified, the latest partition of production data will be copied to your branch when created. You can also manually ingest data into the branch.
For ingestion via API, use a branch environment token with write permissions:
# Start the branch and copy the token (or copy from the UI)
tb --branch=my_branch dev
tb token copy datasource_write && export TB_BRANCH_TOKEN=$(pbpaste)

# Send events to the data source in the branch with the token
curl \
-H "Authorization: Bearer $TB_BRANCH_TOKEN" \
-d $'{"date": "2020-04-05", "city": "Chicago"}\n{"date": "2020-04-05", "city": "Madrid"}\n' \
'https://api.tinybird.co/v0/events?name=events'
For ingestion via CLI, you can use the --branch flag:
tb --branch=my_branch datasource append events fixtures/events.ndjson
Promote a branch
Branches are fundamentally new Forward deployments created in ephemeral cloud environments. When you are finished developing, you can simply deploy the filesystem changes to your production cloud environment:
# Ctrl+C to stop tb dev process, then deploy
tb --cloud deploy
Differences between branches in Forward and Classic
Tinybird Classic users may be familiar with our Classic branches implementation, but branching in Forward has some fundamental differences:
- Branches are Forward deployments—A branch in Forward is fundamentally a deployment on an ephemeral environment. Merging a branch in Forward is as simple as promoting the deployment into the production environment.
- Forward branches are completely—and intentionally—decoupled from git and git providers.
- To promote a Forward branch, simply run a deployment or promote it from the UI. You do not need to use git-based merges and
tb pushin CD pipelines.
Limitations
A few things to keep in mind when using branches:
- This implementation of Branches is for Forward workspaces only, and differs from the Classic branches implementation.
- Ingestion via connectors (Kafka, S3, GCS) is not supported in branches
- Branches use a replica containing a copied subset of production data. They inherently add a cloud dependency during development and CI.
- Do not confuse Tinybird branches with git branches. We currently don't support any integration with git providers for branches. If you want to create a git branch to track your Tinybird branches, you'll need to keep them in sync manually.
Get started with branches
Branches are now available in public beta for all Forward workspaces. You can begin using them immediately.
For more info, read the branches documentation and the CLI reference for tb branch
If you have feedback, please let us know in the #feedback channel of our Slack community, or send us an email.